Showing posts with label Miggins Does Scrapville CT. Show all posts

Saturday, 21 August 2021

Autumn Beauty


For this tutorial you will need:

A tube  of choice, I am using the art of Alex Prihodko
to use this tube you will need to purchase it from PFD Here 
The beautiful FTU SYHO August Blog Train kit by Miggins  Here
My Selection here
Mask 4, from mask set 54 by Rocked by Rachel Here
Picture of choice or the one I used by Valiphoto's at Pixby here


Put the circle selection into your selections folder. 

Open a transparent canvas 700 x 700, flood fill with white.

Add a new raster layer, Go to selections, select all, (copy and paste (C&P))   miggs_syhobt_augblogtrain (22) (I'm going to shorten the name from here (msa-22.jpg) into selection, select none.

Apply mask 4, merge, merge group 

Open msa-20.png C&P onto canvas, go to Effects, MurA's Meister Copies, select encircle from the dropdown menu, Number at 12, Shift X & Y at 50, apply, Add a (Drop Shadow (DS)) I used 0,-4,56,8 throughout.

Add a new raster layer, go to selections, Load/Save selection, Load selection from disk, look for AB_CircleSelec and apply,

C&P the autumn Road pic into selection, select none.

Open msa-31.png C&P onto canvas, go to Image, resize and resize by 85%, add a DS.

Open msa-37.png C&P, resize by 65%, arrange to the right of the branch circle, add a DS then right click on the layer, duplicate, then go to image and mirror.

Open msa-5.png C&P onto canvas, go to image, resize and resize by 60%, arrange on the right of the branch circle, add a DS.

Open msa-30.png C&P onto canvas, resize by 45%, arrange on the left of the branch circle add a DS.

Open msa-24.png C&P onto canvas, resize by 20%, arrange on the left of the branch circle add a DS.

C&P your tube of choice, Resize to your liking, do the thing you do! I add a gaussian Blur of 2, and used xero radiance setting below. add a DS.


Open msa-3.png C&P onto canvas, resize by 50%, arrange on the right, add a DS.

Open msa-32.png C&P onto canvas, resize by 35%, arrange in front of the small pumpkin, add a DS

Open msa-23.png C&P onto canvas, resize by 15%, arrange in front of the small green pumpkin, add a DS

Open msa-19.png C&P onto canvas, resize by 25%, arrange to your liking, add a DS add any other leaves you want, some of the leaves were part of the tube I used.

Add your name, copyright info. we are done, I hope you enjoyed this tutorial.

Sunday, 17 April 2016

Pretty lil Bee


For this tutorial you will need:


The beautiful scrap kit used Blossom to the Bee by Miggins here
MCmask 02\by Kaci from the creative Misfits blog here
Mask MD_21 from my blog here
The tube I have used is FTU by Lia here
please read her TOU here


Put both masks into your mask folder
Open a blank canvas 600 x 600, flood fill with white.

new layer, Go to selections, select all
Open Paper24, go to edit, paste and paste into selection then back to selections, selct none.
Go to layers load/save mask, load mask from disk, in the drop down menu select MC-Mask 02, apply with the following settings, Create from source luminance checked, fit to layer checked and hide all mask checked, go to layers, merge, merge group.

Open paper15 and apply with the same setting, then merge, merge group, go to layers, duplicate, with the duplicate layer active go to image, rotate, free rotate 22% Left, rotate all layers unchecked, then back to image, resize by 110% resample using smart size checked, resize all layers unchecked.

Open element 3, copy and paste as a new image onto your canvas, go to image, resize and resize by 25% same settings as before, we will use these settings throughout this tutorial.

Open element62, copy and paste onto your canvas,go to image, resize and resize by 40%, with your lasso tool, with the following settings, Selection type point to point, mode add(shift) feather 0, trace around the circle using the outer circle as we are going to fill the back ground, open paper, go to image, resize and resize by 10%, copy and paste onto your canvas, then go to selections, invert, then hit delete on your keyboard, then back to selections, select none, move this layer below elements 62 layer.

Make the top layer active by clicking on it, Open element 69, copy and paste as a new layer onto your canvas, go to image, resize and resize by 15% then go back to image and mirror, arrange the tree at the right hand side of the circle to your liking, go to effects, 3D effects, add the following drop shadow 4, -4, 56, 8.

Open your tube of choice, resize and position to your liking then go layers, duplicate, on the duplicate layer change the blend mode to screen, on the original layer add the same drop shadow as used on the tree.

Open elements 66, 67 or 68, copy and paste onto your canvas, go to image, resize and resize by 15%, arrange to your liking, then add a drop shadow the same settings.

Open element74, copy and paste onto your canvas, go to image, resize and resize by 20% arrange at the base of the tree, add a drop shadow settings as before.

Add your name and copyright info. If you have used the tube supplied it is 

©Lia www.Linmida.com . delete the bottom white layer and resize if needed. your done!

Saturday, 22 November 2014

Cheers


For this tutorial you need:
A tube of choice I am using the art of Verymany, to use this tube you will 
need to purchase it  from Verymany Tubes here
A wonderful Christmas kit called Here Comes Santa by Miggins Does Scrapville, you can purchase it from any of the stores Miggins sells at here
My mask 14 you can get it here

Open a New transparent canvas 600 x 600,flood fill with white.

add a new raster layer,open paper 19, go to image, resize, resize by 15%,with the following settings, resample using smart size, resize all layers unchecked, copy and paste onto your canvas, go to layers, load/save mask, load mask from disk, select MD_14_11 from the drop down menu, source luminance checked, fit to layer checked, hide all mask checked, apply then go to layers, merge, merge group.

Open element 66, go to image, resize and resize by 18% copy and paste as a new layer, move slightly up and to the right as shown below.


Add a drop shadow H&V 2, opacity 44, blur 4, color black.

Activate the magic wand tolerance & feather set at 0,click in the space in the middle of the frame, go to selections, modify, expand and expand by 7 pixels,add a new raster layer below the frame layer, Open paper22 go to image, resize, resize by 15%, copy and paste into selection on your canvas, do not deselect.

Copy and paste your tube as a new layer position in the frame to your liking then go to selections, invert and hit delete on your keyboard, back to selections, select none, change the blend mode of this layer to Overlay, go to layers duplicate then change the blend mode to Luminance legacy, the duplicate one more time, change the blend mode of this layer to hue legacy.

Activate the rectangle tool, create as vector checked, H&V radius 0 background color any, foreground color nul, draw out a rectangle slightly bigger than the frame, activate the text tool, select the text your using, size 14,Create as vector selected, position the cursor near the edge of the rectangle, when you see the A with a curve under it click and type Naughty or Nice. repeat these word until it fits the entire way round, open the layers and click the eye nest to the layer that says new rectangle, go to layers, convert to raster layer.

Add eye candy 400, gradient glow with the following settings, choose, fat, glow width 3, apply then apply a drop shadow as before.

Open element 64, go to image, resize and resize by 10%, copy and paste as a new layer onto your canvas, go to image, flip, then layers duplicate, free rotate, rotate by 25 degrees right, rotate all layers unchecked, then go to layers, duplicate, repeat the rotate then duplicate and repeat the rotate again, put the elements together like a bunch go to layers, merge, merge down x2.


pen element 63, go to image, resize and resize by 10%, copy and paste on to your canvas as a new layer, add a drop shadow of your choice or Lokas software, 3D shadow with the following settings,go to layers, duplicate and arrange to your liking.


Copy and paste your tube of choice as a new layer, resize and position to your liking, add a drop shadow of choice, I used the Lokas settings as before, close off the white background layer if desired.

Add your name and copyright information. your done!

Sunday, 26 October 2014

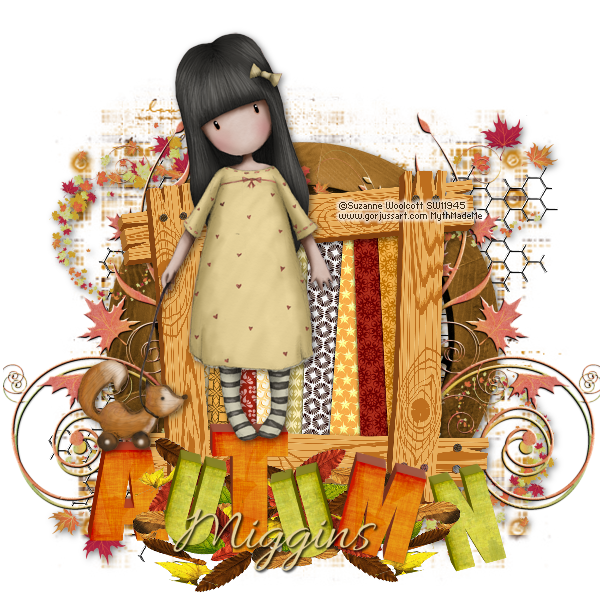
Gorjuss Autumn

Gorjuss Autumn

For this tutorial you will need:
A tube of choice I am using to art of Gorjuss
to use this tube you will need to purchase it from Gorgjuss ART here 
The beautiful scrap kit called Autumns Glory by Miggins Does Scrapville here 
Wordart by Scraps Dimensions here 
Mask 585 from Insatiable Dreams here
Font used Allura here 

Open a blank canvas 600 x 600 pixels, raster background, flood fill with white, in the menu bar go to Layers and add a new raster layer, go to selections, select all, open paper3, go to Layers, Paste, paste in Selections, go to selections, select none.

In the menu bar go to Layers, load/save Mask, Load Mask from Disk,apply 585InsatiableDreams mask with the following settings, Source Luminance checked, fit to canvas checked, Hide all mask checked, go to Layers, merge, merge group.

Open element 23, copy and paste onto your canvas as a new layer, go Image, Resize and resize by 70%, resample using Bicubic checked.

Open Frame 5, copy and paste as a new layer, go to image, resize, resize by 20%, click on Effects, 3D Effects add the following drop shadow (I used these settings for all elements) Offset V2, H2, Attributes Opacity 55, Blur 10, Color Black.

Make the wire layer active by clicking on it, Open element 19, copy and paste as a new layer, go to image, resize change the resample to Smart Size and resize by 25% move toward the top of the frame then go to image, mirror then image and flip, move this on toward the bottom of the frame, go to layers, merge, merge down, add a drop shadow.

Open element4 copy and paste as a new layer, go to image, resize and resize by 35%, add a drop shadow, drag this layer below the frame layer.

Open the cardboard element 8, copy and paste as a new layer, go to image, resize and resize by 30%, arrange to the right of your frame to your liking, go to layers, duplicate, the image and mirror, back to layers, merge, merge down, drag this layer below the frame layer.

Copy and paste your tube of choice as a new layer and arrange to your liking, add a drop shadow.

Open the Autumn word art (SD Autumn WA) copy and paste as a new layer, go to image resize by 50%, resample using Bicubic checked, arrange at the bottom of the frame, add a drop shadow.

Make the frame layer active, with the magic wand, tolerance 0, feather 0 click in the center of the frame then go to selections, modify, expand and expand by 15 pixels, copy and paste a paper of your choice onto the canvas. for this i used one of the previews, go to Image then resize, resize by 60%, go to selection, invert then hit delete on your keyboard, back to selections, select none, drag this layer below the frame layer.

Add your name & copyright info. your done!