Showing posts with label Forum Style. Show all posts

Saturday, 13 February 2021

ArtAttack


For this tutorial you will need:
A tube of choice I am using the art of Eugene Rzhevskii, 
to use this tube you will need to purchase it from PicForDesign Here
Fonts of choice I used Pixette & ChildishKid Here & Here
Texture of choice

Filters Used
Penta color dot
Eyecandy 400 (Optional)

Open a new canvas Width 675 height 275, Choose 2 colours from your tube foreground & background, select the foreground-Background gradient, Linear, Angle 45 repeats none, flood fill the canvas.

Copy & Paste your chosen tube as a new layer, duplicate a few times, arrange across your canvas as shown below.


Copy and paste your texture of choice arrange, colourise, resize to your liking, change the blend mode of this layer to screen or whatever looks best.

Select the crop tool Width 675 Height 275, merge opaque, apply, Merge, Merge visible

Apply color dot default setting.

Select the rectangle tool, Line width 1, line style Dot, change leave the foreground colour set to the gradient, background null, draw out a rectangle as shown in the screen shot below, right click on the layer in the layer palette, convert to raster, Duplicate the layer, go to image, resize & resize by 90%, image, mirror, 


With the merged layer active, activate the selection tool Rectangle, feather 0, draw out the first dotted rectangle (I had to zoom in for this) Right click on the merged layer & promote layer to selection, change the blend mode of this layer to Burn, selections select none.

Repeat these steps with the inner dotted rectangle but change the blend mode of the promoted layer to overlay.

Select a pixel font. I used Pixette Size 6 Anti-alias off, Type whatever you want then right click convert to raster layer. place in the gap at the top between the dotted lines. see my tag for reference

Duplicate this layer and move below between the bottom lines.

Copy & paste your tube as a new layer, resize and arrange to your liking. duplicate the tube layer, on the duplicate layergo to adjust, blur, avaerage set to 5 & apply, now change the blend mode of this layer to screen or whichever mode you prefer,on the bottom tube layer, add a drop shadow.

Add a new layer on top flood fill with one of the colours from your gradient, go to selkections, select all, selections modify, contact by 4 hit enter then delete, selections, select none

Add another raster layer, floodfill with the other colour from your gradient, repeat the above steps by contract by 2

Add your name & copy right info. You are done!


Wednesday, 10 February 2021

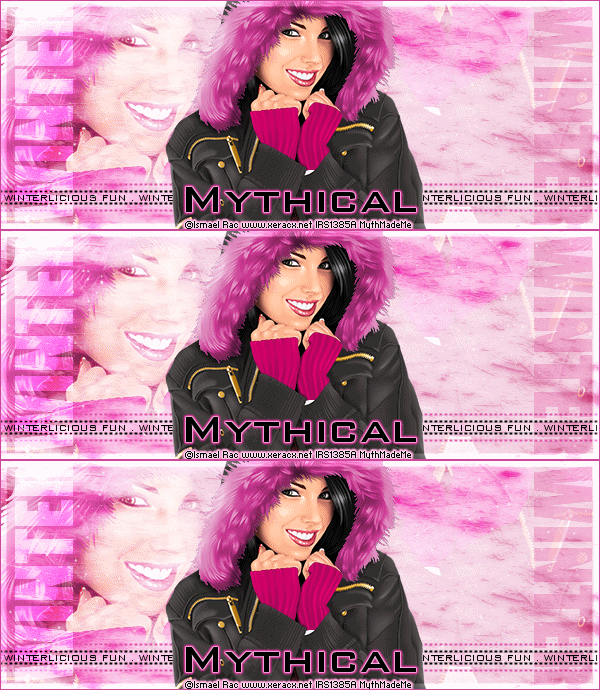
Winterlicious


For this tutorial you will need:
A tube of choice, I am using the art of Zalta_M
to use this tube you will need to purchase it from PDF Here
 
VanDerLee Snowflakes filter Here
Texture Pack #109 by Sanami276 at DevientArt 
here

1.

Open a blank canvas 675 x 275, flood fill with white.

Add anew raster layer, Go to selections, select all

Copy & paste one of the textures from the pack #109,

 I used Texture 30 into selection. colourise to compliment your tube

2.

Copy and paste your tube as a new layer, arrange to your liking, duplicate the layer, go to image & mirror arrange as desired, right click the layer, merge, merge down, change the blend mode to screen or soft light which ever looks better.

3.

Activate the pen tool, choose draw lines and polylines, line style dots, Width 2, anti alias checked, colour black, holding shift draw a line across the tag, right click the layer, convert to Raster layer.

4.

Repeat step 3 but change the colour to one that compliments your tube, place the two lines close to each other, merge the two lines together, duplicate, go to image, flip arrange close to the other lines leaving a gap for your words (see my tag for reference)

5.

Activate the text tool choose a pixel font, I used Bank Gothic Condensed  size 8, colour black in caps type out Winterlicious fun or words of your choice, right click the layer convert to raster layer.

6.

Change the font to a thick font, I used Impact size 55, change the colour to white or a very light colour from your tube type out winter in caps, go to, image, rotate, free rotate and rotate 90 degrees left, arrange to the side of the tag leaving a small gap all around, convert to raster layer, add a drop shadow I used V&H 1, Opacity 53, blur 1. Change the blend mode of the layer to soft light, multiply or overlay which ever looks best.

7.

Repeat step 6 but rotate 90 degrees right.

8.

Go to layers, merge, merge visible then selections, select all, modify, select selection borders, inside, border width 6.

9.

Go to Adjust, brightness and contrast, brightness/contrast, change the brightness to 50, contrast 0, selections, select none

10.

Copy and paste your tube of choice as a new layer, resize if needed, arrange to your liking, Duplicate change blend mode to one you like (Optional) add a drop shadow to the bottom tube layer H 3 V -3 Opacity 20 blur 6, select the crop tool, snap crop rectangle to merged Opaque, apply the repeat step 9 on your tube layer.

11.

Add a new raster layer, move to the top,
flood fill with a colour that compliments your tube, go to selections
select all, modify, contract by 1 pixel then hit delete on your keyboard
Add your name & copyright info.

If you are not animating you are done.

Animation

1.

Duplicate the bottom merged layer 2 times for a total of 3 layers, rename the layers 1,2 & 3

2.

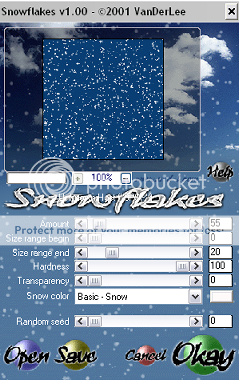
Make layer 1 active apply VanDerLee Snowflakes with the following settings.


3.

Apply VanDerLee snowflakes to layers 2 & 3 with the same settings but change the random seed each time. Hide layers 2 & 3

4.

Open Animation shop(AS), In Paint Shop(PS) go to edit, copy merged over in AS go to edit and paste as new animation

5.

In PS hide layer 1, unhide layer 2, go to edit, copy merged over in AS go to edit and paste after current frame.

6.

In PS hide layer 2, unhide layer 3, go to edit, copy merged over in AS go to edit and paste after current frame. Save Tag

Avatar

1.

Open a blank canvas 180 x 180 copy and paste layer 3 from your tag as a new layer, arrange to your liking, copy and paste your tube as a new layer, arrange to your liking, merge visible.

2.

select the crop tool, snap crop rectangle to merged Opaque, apply

3.

Repeat step 9, add your name and copyright Information


Your Done!

Avatar.png picture by mythicaldesigns

Image2.gif picture by mythicaldesigns


Proud member of Tutorial Writers Inc 

Tutorial written by © Mythical
all rights reserved

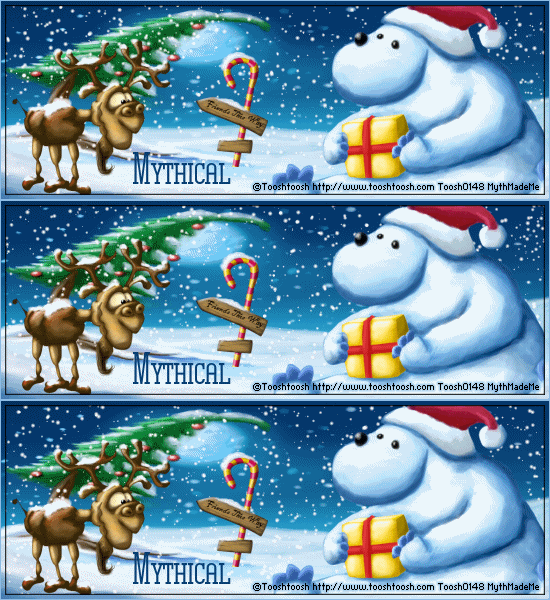
North Pole


For this tutorial you will need:
Tube or tubes of choice, I am using the art of Toosh Toosh, 
the tubes I am using are free, BUT you still need a licence, you can get it here
Filter used VanDerLee Snowflakes

1.
Open a blank canvas 550 x 200
Go to selections, Select all
Copy the picture and paste into selection, using the deform tool tool to stretch to fit the canvas if needed,

If you are not going to animate move to step 4

2.
Duplicate this layer 3 for a total of 4 layers, Rename the bottom layer bg and hide, rename to remaining layers a, b & c
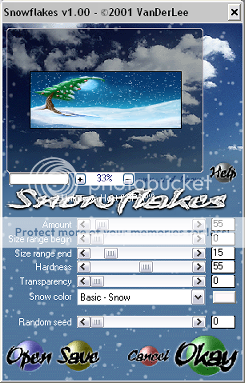
Appy VanDerLee snowflakes to Layers a,b & c with the following setting changing the random seed each time

image

3.
Hide layers b & c for now

4.
Copy and paste the bear or tube of choice and move to the right side of the canvas, resize as desired.

5.
Copy and paste the candy cane or other element of choice I resized by 15% smart size, resize all layers unchecked.

6.
Copy and paste the reindeer as a new layer and resize by 25% same settings as before.

7.
Go to selections, select all, modify, contract by 5 pixels, selections, invert, Click on each layer except the bg layer and hit delete on your keyboard, unhide the bg layer, make the top layer active, Add a new raster layer then add a drop shadow H&V 1, opacity 100, Blur 2, Colour black, add the same drop shadow again but change the H&V to  -2.

8.
Add a new layer flood fill with a colour that compliments the tag, go to selections, select all, modify, contract by 1 pixel then hit delete on your keyboard, go back to selections, select none.

9.
add your name & copyright information,

ANIMATION

10.
Hide the bg, a b & c layers, then go to layers, merge, merge visable
Unhide The bg layer and layer a, go to edit, copy merged, then open Animation Shop(AS), go to edit, paste as new animation.

11.
back to Paint Shop(PS) Hide layer a & unhide layer b, go to edit, copy merged, back to AS, Paste after current frame

12.
back to PS Hide layer b & unhide layer c, go to edit, copy merged, back to AS, Paste after current frame, Go to edit, select all, then animation, frame properties set to 20, view your animation. save

  
AVATAR

Open a blank canvas 150 x150, flood fill with a colour from your tube, Reapeat step 2 but use the following VanDerLee snowflakes settings

image

Copy and paste your tube, resize as arrange as desired, select the crop tool and snap crop rectangle to merged opaque,

Repeat steps 7, 8 & 9
 
Repeat the animation steps 10, 11 & 12,
 

Your done!


Proud member of Tutorial Writers Inc

Tutorial written by © Mythical
all rights reserved

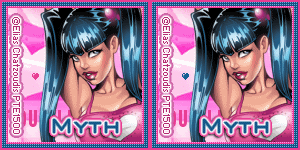
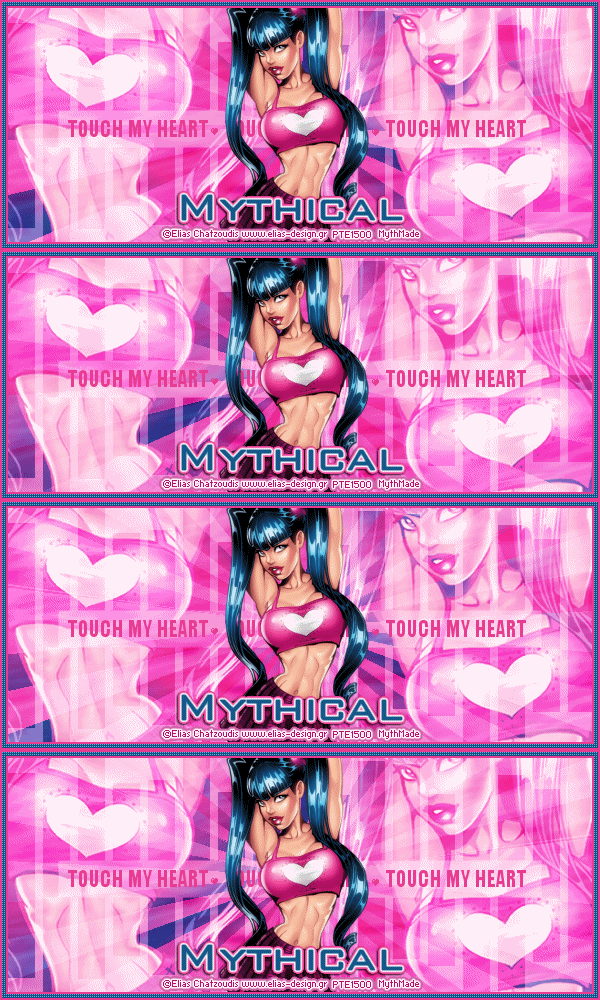
My Heart

 image

image

For this tutorial you will need:
A tube of Choice, I am using the work of Elias Chatzoudis,
to use this tube you will need to purchase it from PSP Tubes Emporium here
My Supplies here

Plugin used:
Penta Color dot
VM Extravaganza Ray Transmission


1.
open a blank canvas 600 x 250
Set you foreground & background colours to two very different colours from
your tube, go to the gradient tab, find the background/Foreground Gradient, set
the angle to 45, Repeats 2, flood fill your canvas.

2.
Duplicate this layer, rename the layers 1 & 2, On layer 1, go to Effects,
plugins, VM Extravaganza, Ray Transmission and use the following setting 81,
100, 18, duplicate the layer, go to image, mirror

3.
(Do this step only if you intend to animate) Repeat step 2 with layer 2 but
change the Rays setting to 91, Rename the Ray Transmission layers R1,R2,R3, & R4

4.
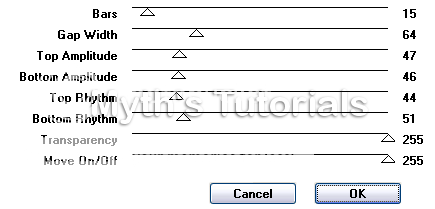
Copy and paste the rectangle as a new layer, go to Effects, Plugins, VM
Extravaganza, shoutin'! and use the following settings
image
Change the Blend Mode of this layer to Soft Light.

5.
Copy and paste your tube or close ups as a new layer 2 times, arrange to your
liking, right click on the top layer, merge, merge down, change the Bond Mode of this layer to screen.

6.
Add anew raster layer, go to Selection, select all, Copy the texture from the supplies,
Paste in
to selection, selections, select none, recolour if needed.

7.
Type out what you want for the rectangle, I used Impact, size 16 & put a pixel
heart between the words(pixelheart supplies) Add any other words you wish, go
to edit, copy & paste as  new image, minimise(we will use this for the avatar)

8.
Copy and paste your tube as a new layer, resize if needed. Duplicate, go to
Adjust blur Average, set to 11, change the blend mode of this layer to soft light.

9.
active the bottom layer, select all, add a new raster layer, right click,
arrange, send to top, go to Selections, contract by 8, pixels, fill with 1 of
your chosen colours, Selections, select none, back to selections select all,
selections, contract by 6 pixels, fill with the other colour
Go to Effects, plugins, Penta colour dot use the following settings - 90, 2,
255, 255, 255, selections, select none, add new layer, fill with 1st colour, go
to selections, contract by 2 pixels, hit delete on your keyboard.

10.
Add your name & copyright information (If your not animating your done!)

Animation

1.
Hide layers R2, R3 & R4, go to Edit copy merged, Open Animation Shop(AS) Go to
edit & paste as a new animation.

2.
Back to Paint shop(PS) hide layer R1 & unhide layer R2, Edit, copy merged,
Back to AS, edit, paste after current frame.

3. Repeat step 2 with R3 & R4

Your Done!

Avatar

1.
Open a blank canvas 150 x 150, copy and paste the image we minimised earlier
as a new layer, arrange to your liking, select the crop tool, Snap crop
rectangle to: Merged opaque image

2.
Repeat steps 8, 9 & 10.

3.
Go to Edit, copy merged, over in AS Paste as new animation,
then Paste after current frame
.
4.
Open the HeartAnimation from the supplies in AS
*Note If you need to re colour - then Go to edit, select all, File, Export frames to
Paint Shop Pro, over in PS recolour each heart close image, click no, then yes.
Back to AS Edit select all, On the Avatar Paste into selected frame. 
 
Your Done!


Proud member of Tutorial Writers Inc

Tutorial written by © Mythical
all rights reserved

Lucky Me


For this tutorial you will need:
Tube of Choice I am using the art of Keith Garvey
to use this tube you will need to purchase it from PTE 
here
 ivy_grass = Gradient Here (2nd line down - 3rd one along)
Luck Me word art by Kandy Kane Creations 
Here 
My Supplies Here


1.Open a blank canvas 600 x250,flood fill with the Ivy_Grass gradient, angle 45 degrees, repeats 0, go to effects texture effects, Blinds set width 2, opacity 30, Colour white, horizontal checked,

2.copy and paste V~ShamrockSet2004-2005,as a new layer change the blend mode of this layer to Overlay, rename this layer Shamrock

3. Copy and paste your tube as a new layer arrange to your liking.
 
4. Open the Lucky word art, resize by 30% same settings as before, copy and paste as a new layer onto the canvas, in the space next to your tube

5. Make the gradient layer active, go to selections, select all, selection, modify, contract by 10 pixels, selections invert, add a new layer right click, arrange, send to top flood fill with a dark colour from your tube, back to selections, modify contract by 3 pixels flood fill with Gradient but change the repeats to 3, Keep selected, go to Adjust Add/Remove noise add noise, Random, 25, Monochrome checked. selections, select none

6. Add your name and copyright information

Animation
1. close off all the layers above the Shamrock layer by clicking on the eye next to the layers
2. Go to edit, copy merged, now over in Animation shop(AS) go to edit, paste as a new animation, repeat this another 4 times for a total of 5 layers.
3. Open the LuckyMe animation up in AS edit, select all, edit copy, edit paste into selected frame.
4. Back to PSP Close off all the layers beneath the Shamrock layer and open all the layers above, go to edit, copy merged.
5. In AS go to edit, select all, edit copy, edit paste into selected frame.
6. Go to animation, Frame properties and change to 22

Avatar
1. Open a blank canvas 150 x 150, flood fill with the ivy_grass gradient apply the same Blinds effect as before.
2. Copy and paste your tube as a new layer resize and position to your liking.
3. Repeat steps 5 & 6
4. Copy and paste the clover as a new layer, arrange to your liking

Animation
1. Go to edit, copy merged.
2. Open the CloverAni in AS, go to edit, select all, edit copy, edit paste into selected frame
3. Go to Animation, Frame properties and change to 22.

Your done!


Proud member of Tutorial Writers Inc

Tutorial written by © Mythical
all rights reserved

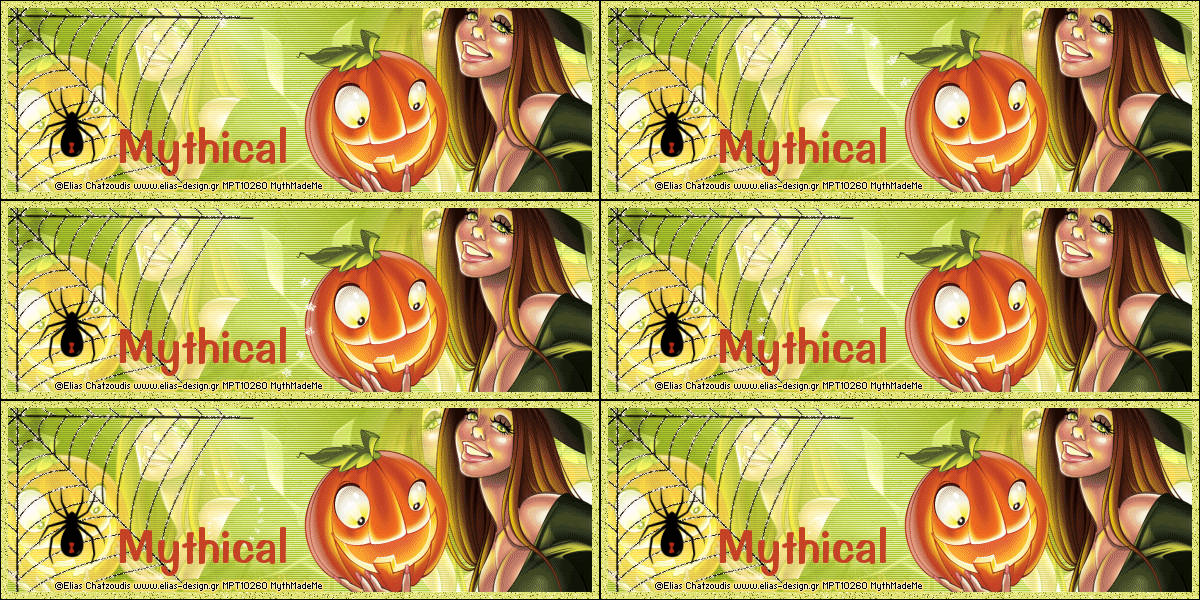
Green Halloween

HFS_Avatar.png

HFS_Tag.png

For this tutorial you will need:
A tube of choice I am using the art of Elias Chatzoudis
to use this tube you will need to purchase it from My PSP Tubes 
here

My supplies 
here (these supplies are made by me, use them as you wish)

Font used Impress BT, you can get it 
here


1.

Open a blank canvas 600 x 600 flood fill with white,

Copy and paste the texture as a new layer, recolour to your liking

2.

Go to Effects, Texture effects, blinds change the colour to a prominent colour from your tube and apply with the following settings

Width – 2

Opacity – 24

Both Horizontal & Light from left/Top checked, Change the name of this layer to bg.

3.

Copy and paste your tube of choice as a new layer 2 or 3 times depending on the size of the tube, aim to fill most f the canvas, arrange to your liking, activate the top copy, go to layers, merge, merge down, activate the crop tool, snap crop rectangle to – merged opaque, change the blend mode of this layer to screen or soft light which ever look better.

4.

Copy and paste your tube as a new layer, arrange to your liking, activate the crop tool, snap crop rectangle to – merged opaque.

5.

Copy and paste the web as a new layer, position to the left top corner as desired.

Copy and paste the spider as a new layer, arrange on the web as desired.

6.

Add a new layer, go to selections, select all, selections, modify and contract by 8 pixels, selection, invert flood fill with a light colour from your tube, go to adjust, add and remove noise, add noise, 25%, random checked, monochrome checked, selections, select none.

7.

Add a new raster layer, flood fill with black, go to selections, select all, modify and contract by 1 pixel, then hit delete on your keyboard, selections, select none.

8.

Add your name & Copyright information


Avatar

1.

Open a blank canvas 150 x150 flood fill with white.

2.

Copy and paste the bg from the signature tag, arrange to your liking, activate the crop tool, snap crop rectangle to – merged opaque.


3.

Copy and paste your tube of choice as a new layer, arrange to your liking, activate the crop tool, snap crop rectangle to – merged opaque.

4.
copy steps 6, 7 and 8 above.

Your done!
HFS_Animated.gif picture by mythical323


Tuesday, 9 February 2021

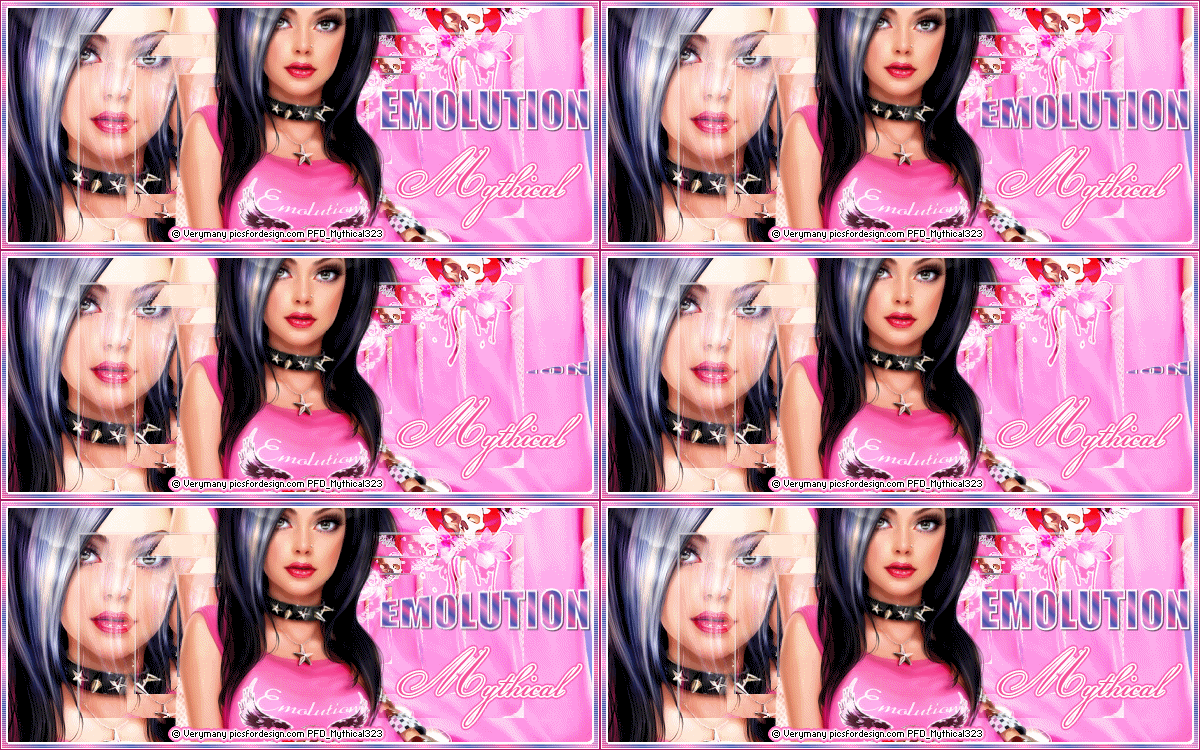
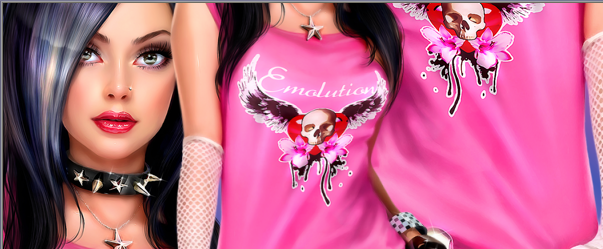
Emolution

image
image


For this tutorial you will need:
A tube of choice i am using the fab art of verymany
to use this tube you will need to purchase it from Pics For Design here
My Gradient here

Put the EmoGrad_Myth Gradient into your gradients folder

1.
Open a blank canvas 600 x 250
floodfill with the EmoGrad_Myth gradient,Style Linear angle 45%, Repeats 0, colourize if needed.

2.
Copy and paste you tube 3 time, arrange as shown in the screen shot below,

image

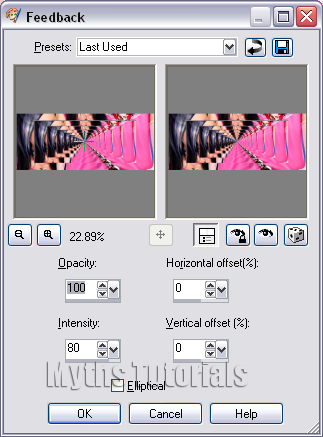
select the crop tool and snap crop rectangle to merged opaque, duplicate this layer, one the duplicate layer go to effects, Reflection Effects, Feedback and add the following settings

image

Change the blend mode of this layer to Screen.

3.
Copy and paste your tube as a new layer resize and arrange to your liking.

4.
Activate the text tool, change the background colour in the materials palette to the EmoGrad, we used earlier but  change the repeats to 4, set the foreground to white, select a think font, I used Impact size 36,stroke 2, Type out Emolution or a word of your choice, right click the layer, convert to raster layer, add the following Drop Shadow H & V 1, Opacity 60, Blur 1, colour Black, rename this layer Ani(only if you are going to animate) 

5.
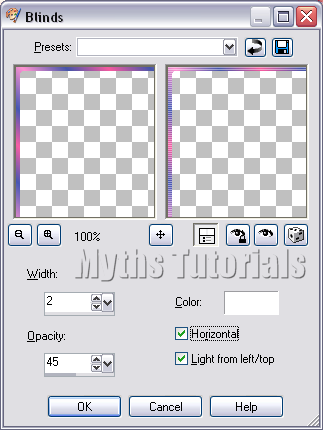
Activate the bottom layer, selections, select all, Selection modify contract by 8 pixels, selections invert, add a new raster layer, right click the layer, arrange, send to top, flood fill with White, go to selection, modify and contact by 2, add a new raster layer and floodfill with the Gradient we used earlier, same settings, Go to Effects, Texture effects, Blinds, add the following settings

image

6.
Add a new layer, Flood fill with #a71c65 or a colour of your choice, go to selections, select all, selections, modify, contract by 1 pixel, hit delete on your keyboard, selections, select none.

7.
Add your name and copyright information, if you are not animating you are done!

Animation

1.
Hide everything except the layer we renamed Ani, go to edit, copy merged.

2.
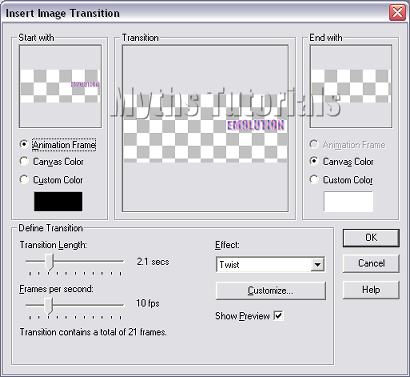
Open Animation Shop(AS) go to edit, paste as a new animation, go to Effects, Insert image Transition, use the following settings, Delete frames 19, 20, 21 & 22.

image


3.
Back Paint Shop(PS) Unhide everything below the Ani layer, then hide the Ani layer, go to edit, copy merged, Back to AS, Paste as new animation, duplicate the frames until you have 18 in total (Ctrl + L)

4.
Go to edit Select all, Edit copy, edit paste as new animation, Edit select all then go to Animation, reverse frames, edit copy, then back to the original make layer 18 active by clicking on it, edit paste after current frame, you should have a total of 36 frames now.

5. back to PS, Hide every below the Ani Layer and unhide everything above the Ani layer, go to Edit copy merged then back to AS, paste as a new animation duplicate as before but for a total of 36 frames this time, Edit select all, on the original tag edit select all, then edit paste into selected frame

You are done!

Avatar

Open a canvas 150 x 150, 

1.
Follow steps 1 & 3 from above, but I chose to use the pic on her t shirt for this, apply the Feedback filter same settings as before,

2.
Select your font tool, impact size 18, foreground colour null, background colour white, type out EMOLUTION, Convert to raster layer, go to image, rotate, free rotate by 90 degrees right, move to the right of the canvas.

3. repeat step 3 again, then steps 5, 6 & 7.

For the Twinkle I used Twinks from jalJax Designs Herehttp://www.jaljaxdesigns.com/Twinks.htm 


Proud member of Tutorial Writers Inc

Tutorial written by © Mythical

all rights reserved 

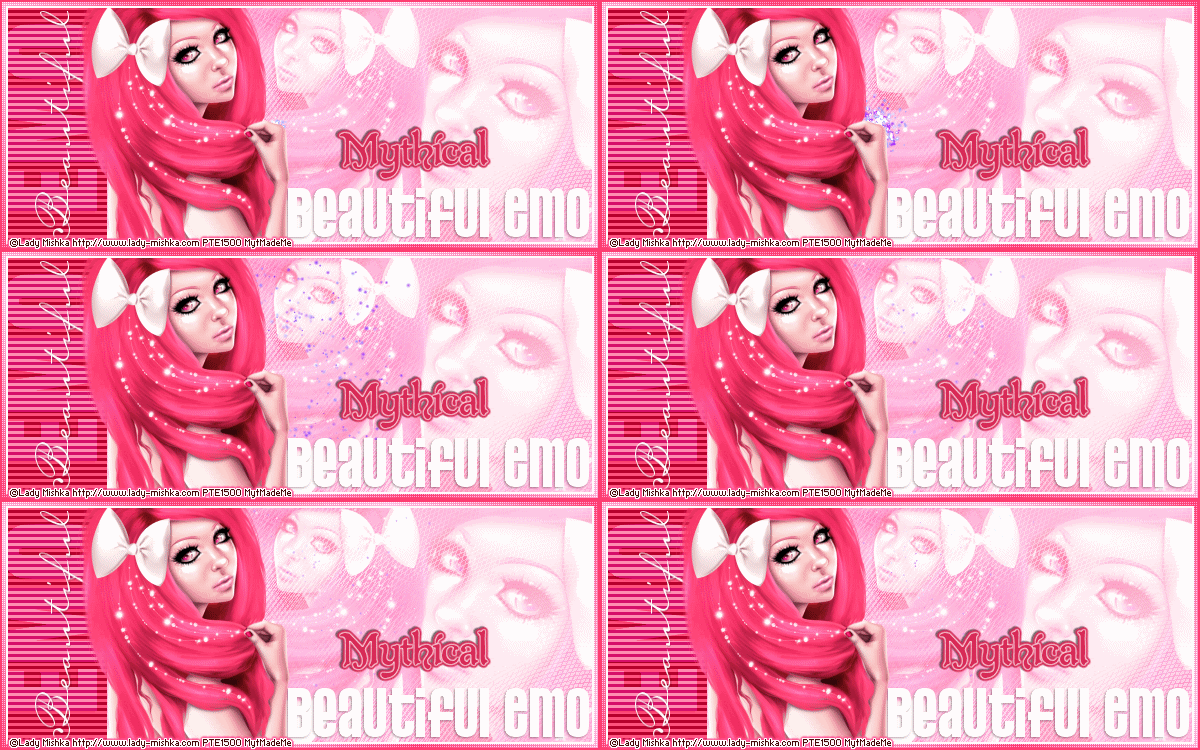
Beautiful Emo

 image


For this tutorial you will need:
Tube of choice I am using the art of Lady Mishka to use this tube
you will need to purchase it from Scraps and the City here
Missy's beautiful Animations here
Supplies here

Filters Used:
Tramages Wire Mesh
VM Extravaganza, Transmission
Penta Color Dot

Banner

1.
Open a blank canvas 600 x 250, flood fill with a gradient of choice, Style Linear, angle 45, repeats 1

2.
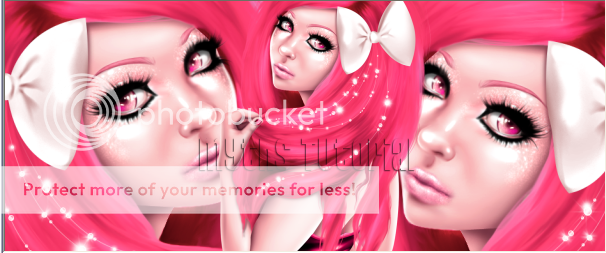
Copy and paste your close up and tube, arrange as shown below

image

3.
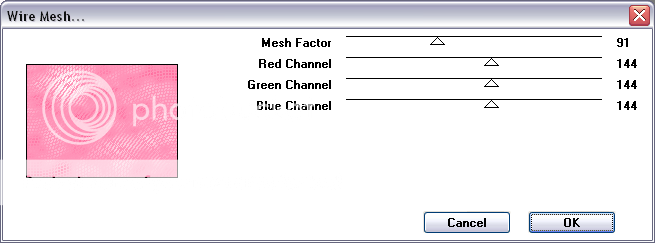
Copy and paste the texture from the supplies, colourize if needed, change the blend mode of this layer to Screen, Go to effects, Plugins, Tramages, Wire Mesh and use the following settings,

image

right click on the top layer, merge, merge visible.

4.
Activate the Font tool select a thick font I used Pussycat size 55, Background colour white, foreground colour null, type out the words you want I typed out Beautiful Emo, add a drop shadow H 1, V -1, Opacity 33, blur 3, color black, move to the lower right hand corner of the canvas.

5.
Copy and paste the rectangle as a new layer, colourize to compliment your tube and move to the left hand side of the canvas, go to Effects, plugins, VM Extravaganza, Transmission, use default settings

6.
Activate the font tool again choose Impact from the dropdown menu size 88, Background white, foreground null, I typed out EMO, go to Image, Rotate, Free rotate and rotate by 90 degrees left, move the word on top of the rectangle, change the blend mode of this layer to Soft Light, change your font to a script font I used carpenter script Size 38 and typed out Beautiful, rotate by 90degrees left and move on top of the other word, add the same drop shadow used earlier.

7.
Copy and paste your tube of choice as a new layer, arrange to your liking slightly to the right next to the rectangle, duplicate the tube on the duplicate layer go to Adjust, Blur, Average , set to 11, change the blend mode of this layer to Soft Light.

8.
Make the bottom layer active, Selections, Select All, Modify, Contract by 8 Pixels, selections, invert, add a new raster layer right click, arrange bring to top, flood fill with white, Selections, Invert, Selections Modify Expand by 2, selections invert, add a new raster layer flood fill with your gradient of choice, Linear, Angle 45, repeats 3, Go to Effects, Plugins, Penta Color Dot and use default settings, Go back to selections, select none, Add a new raster layer , flood fill with a dark colour that compliments your tube, select all, modify, contract by 2 pixels, hit delete on your keyboard, selections, select none.

9.
Add you name and copyright information, if you are not animating you are done!

Animation

1.
Hide all the layers except for the merged layer on the bottom, go to edit, copy merged, Open up Animation shop(AS), go to Edit, paste as new animation hold the Ctrl key down and hit L 12 times you should have 13 frames now

2.
Open the sparklecircleblast in AS, go to edit select all, then edit copy, then on your banner, edit select all, edit paste into selected frame ( I placed it centre & slightly to the left).

3.
Go back to Paint Shop(PS) Hide the merged layer and unhide the other layers, go to edit, copy merged back AS Paste as a new animation, again hold the Ctrl key down and hit L 12 for a total of 13 frames,

4.
Go to edit, select all, edit copy, then onto your banner, edit select all, edit paste into selected frame


Proud member of Tutorial Writers Inc

Tutorial written by © Mythical
all rights reserved

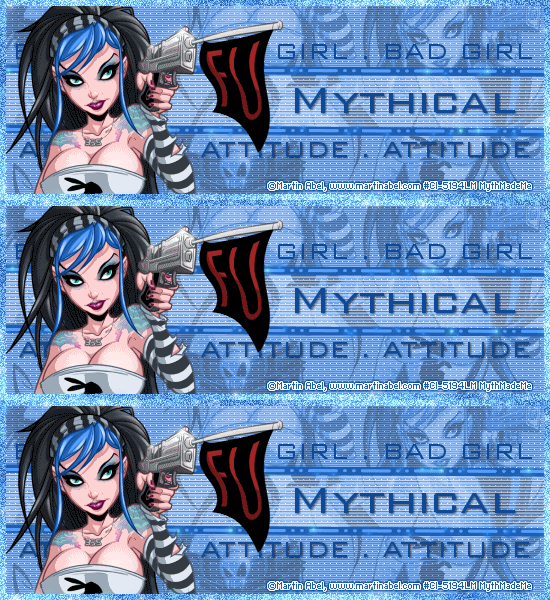
Bad Girl

 Animation2.gif picture by mythical323

Animation1.gif picture by mythical323


For this tutorial you will need:
A tube of choice, I am using the art of Martin Abel to use his art
you will need to purchase it from the Creative Designs Outlet 
here 

dbs Flux Bright Noise
Xenofex 1 

Font used - Bank Gothic MT BT Medium Here

Open a new canvas 550 x 200

Choose a colour to match your tube of choice, flood fill the canvas

Go to effects, texture effects, weave apply the following settings:

Gap size 1, Width 5, Opacity 1, weave colour & Gap colour both black, Fill gaps checked.

 Go to effects, texture effects, Blinds, apply the following settings: Width 2, Opacity 35, Colour a darker one from your tube. Both Horizontal & Light from left/top checked.

 Copy and paste your tube three times onto your canvas arrange as desired

Hide the bottom layer right click the top layer, merge, merge visible.

Select the crop tool then click snap crop rectangle to merged opaque.

Unhide the bottom layer.

 Change the merged layer blend mode to Luminance & change the Opacity of the layer to 30, right click merge, merge down. right click go to rename and  rename this layer bg.

 Set the background colour to a dark colour from your tube.

Select a dark colour from your tube activate the Pen tool Line style solid, width 8.00, anti-alias checked, draw a line across the Canvas (see my tag for reference)

Select a light colour from your tube, change the line style to  Dash Dot Dot, change the line width to 3, place directly one top of the line , right click the layer, merge, merge down,

 Duplicate this layer and move the duplicate line about ¾ of the way down the page (see my tag for reference) again right click, merge, merge down, rename this layer Lines.

 Make the bottom layer active, select the rectangle selection tool and select the area between the two line, making sure the bottom layer is active, go to image, mirror, add the blinds again but change the width to 3 and the Opacity to 50. selections, select none

 Change your background colour to the lighter colour form your tube or white if you prefer, select the font tool, find a font I used Bank Gothic Light, 22, put your caps lock on, type out: “BAD GIRL .” 3 times, add the following drop shadow V&H 1, opacity 60, Blur 3, Color Black. (optional)  I also added ATTITUDE beneath the bottom line.

 Copy and paste your tube of choice as a new layer, resize if needed, Move to one side of the canvas.

 Change the background colour the dark colour from your tube, change the size to 36, type out your name, add the same drop shadow as before

 Make you bottom layer active, Go to selection, select all, selections, modify, contract, contract by 6 pixels, back to selections, invert  add a new layer, move this layer to the top, set the background colour to a dark colour from your tube & the foreground to a light colour find the foreground-background gradient change the angle to 39, set repeats to 4, invert unchecked, flood fill the layer, go to effects, plugins, DsbFlux, Bright noise, intensity 54, click on lighter, Rename this layer border. Add your copyright information

 Activate the bottom layer copy and paste as a new image.

 Avatar
Open a blank canvas 150 x 150, copy and paste the bg layer from your banner a new layer, Select the crop tool then click snap crop rectangle to merged opaque.

 Copy and paste your tube of choice as a new layer, resize if needed and position to your liking

 Make you bottom layer active, Go to selection, select all, selections, modify, contract, contract by 4 pixels, back to selections, invert  add a new layer, move this layer to the top, Flood fill with the foreground-background gradient used earlier, go to effects, plugins, DsbFlux, Bright noise, intensity 54, click on lighter. Add your name & copyright information.

 Animation (Optional)

 The signature tag – hide the border, lines & bg layers, go to layers, merge, merge visible. Unhide the layers.

 1. Make the lines layer active, go to selections, select all, selections float, selections, de float right click the lines layer click promote selection to layer, repeat 2 more times.

Selections, select none

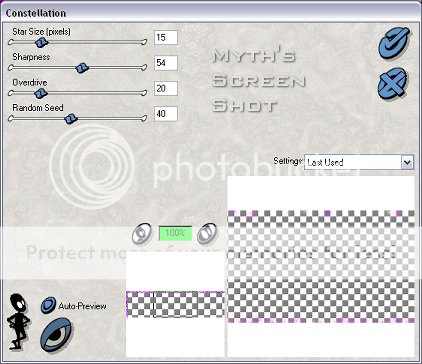
 2. Click on the top promoted selection  layer, go to effects, plugins, Xenofex 1, constellation, use the following settings.

 image

 3. Repeat steps for the middle & bottom promoted layers, but change the random seed to 45 for the middle promoted layer and 50 for the bottom promoted layer.  

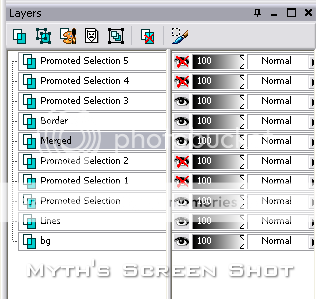
 4. Repeat steps 1 to 4 on the border layer. Then hide the top & Middle layers on both the border promoted layers and the lines promoted layers. This is what you should have in your layers palette

image

 5. Go to edit, copy merged, open animation shop go to edit and paste as a new animation.

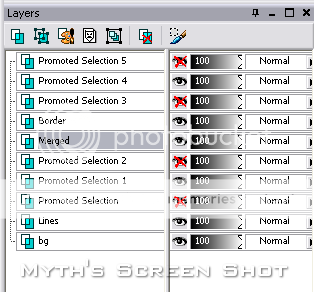
 6. Go back to Paint Shop hide the bottom promoted layers and unhide the middle promoted layers as shown in the screen shot,

image

 go to edit, copy merged. Go back to Animation Shop edit, paste after current frame.

7. Repeat step 6 for the top promoted layers. Then in Animation Shop go to edit, select all, then go to Animation, frame properties set the display time to 15, then go back to animation, select animation properties, click Opaque and change the colour to white, save your animation

 8. Activate the avatar you made to match repeat steps 4,5,6,&7

 Your Done!


Proud member of Tutorial Writers Inc

Tutorial written by © Mythical
all rights reserved

Saturday, 8 November 2014

Warm Winter


Tube of choice, I am using the art of Ismael Rac, you can purchase
this tube from the  XeracX store here
Penta Color Dot you can get it here
Font used Impact here & Good Karma here
Supply's here

1. open a blank canvas 650 x 225, set the foreground color a light color from your tube of choice and the background to a dark color. click on the gradient tab and select the foreground/background    gradient, apply the following settings,linear, angle 45, Repeats 7, flood fill the canvas.

2. Go to effects, select Penta color Dot, change the value to 100, distance to 20 and apply.

3. Copy and paste your tube as a new layer, arrange on the right of your canvas, when happy go layer,    duplicate then go to image and mirror then back to layers, merge, merge down, duplicate this layer,    activate the original layer, go to adjust, blur, gaussian blur, set the radius to 3, apply, change the    blend mode of the duplicate layer to screen, change the opacity of both tube layers to around 75.

4. Copy and paste Flake 1 from the supply's, go to image, re-size, re-size by 35% with the following settings, resample bicubic, re-size all layers unchecked. repeat step 3 with the snowflake but change the opacity of the snowflakes layer to 50.

5. set you background color to white, foreground to null, select your text tool, Impact, size 48, create as vector, put your caps lock on and type snow or any word of your choice, on the bottom right of your canvas, go to layers, convert to raster layer, back to layers, duplicate, move this layer to the bottom left of your canvas,Add a drop shadow to each with the following settings H&V 1, opacity 20, blur 4, color black,go to layers and duplicate each layer once.

 6. go to layers, merge, merge visible, back to layers, properties,and rename this layer bottom, activate the crop tool, width & height 1 pixel, top, left, right, bottom all at 0, snap crop rectangle to merged opaque apply.

7. Copy and paste your tube as a new layer, re-size if needed and arrange in the center of your canvas to your liking,go to layers, rename layer repeat the crop tool as in step 6, go to layers, duplicate, repeat the steps in step 3 but do not change the opacity of the layers.

8. Add your copyright info and arrange as desired,hide the bottom layer by clicking on the eye by the layer in the layer palette, go to layers, merge, merge visible, unhide the bottom layer, you can add your name now or later in animation shop.(later is best if your making tags for others) 

9. add a new raster layer, with the foreground and background set as in step 1, flood fill you canvas with the light color.

10. Go to selections, select all, selections, modify, contact, contract by 5 pixels, hit delete on your keyboard, selections, deselect.

11. with the foreground set with the same gradient as in step 1 change the number of repeats to 3, add a new raster layer, flood fill your canvas and repeat the steps in step 9 but contract by 3 this time.

12. activate the light color layer go to layers, duplicate and duplicate this layer twice, rename these layers 1, 2, and 3, activate the layer named 1, go to adjust, add/remove noise, add noise,check random, set noise to 33%, monochrome checked, apply, repeat this on the layers named 2 & 3 but change the % on the noise to 36 & 39.

Animation.


1. Open Animation shop, in paint shop, hide all the layers above the the bottom layer, with the bottom layer active, click on the layer in the layer palette to do this, go to layers, copy, then in Animation shop, 
go to edit and paste as new animation, on your keyboard hold down the ctrl button and hit L repeated until you have 28 frames.

2. Open up the MD_ani_01 from your supplies in Animation shop, go to edit, select all,edit copy then edit select all on your canvas, hold down the ctrl key on your keyboard press E, do not release the ctrl button until you have arranged the animation as desired,

 go to animation, frame properties and set to 5, close the MD_ani_01 now.

3. Back to Paint shop, hide the bottom layer and unhide the other layers except layers 2 & 3, 

4. go to edit, copy merged, in Animation shop edit, paste as new animation.

5. Back to Paint shop, hide layer 1, open layer 2, repeat step 3. but instead of pasting as a new animation paste after current frame.

6. In paint shop, hide layer 2 and unhide layer 3, repeat step 5.

7. Still in Animation shop, go to edit, select all, make the last layer of the 3 layers active by clicking on it, then edit, paste after current frame, repeat this until you have 30 frames, click the last layer and delete, the repeat so you have a total of 28 layers.

8. go to edit, select all, edit, copy, then on your original animation, edit select all, hold down ctrl, hit E on your keyboard, holding ctrl until you have the frames exactly when you want them, then release E. go to view, animation when happy add name if you haven't already ( you can add you name using paint shop and copy and paste it in animation shop, duplicate 28 times and copy and paste onto your canvas as before.

Your done! <3