Showing posts with label Christmas. Show all posts

Wednesday, 10 February 2021

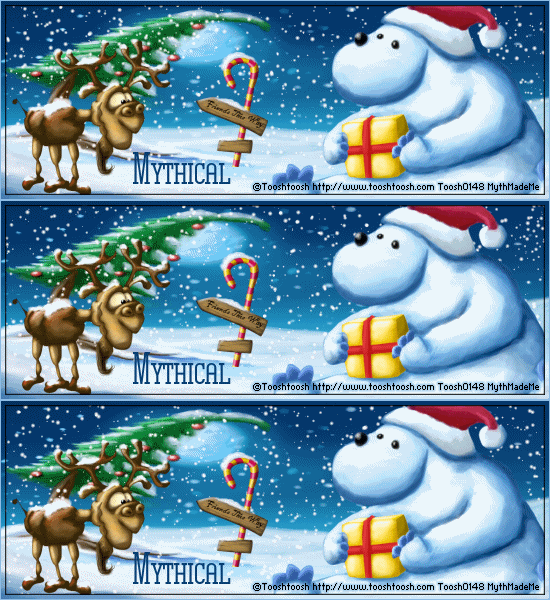
North Pole


For this tutorial you will need:
Tube or tubes of choice, I am using the art of Toosh Toosh, 
the tubes I am using are free, BUT you still need a licence, you can get it here
Filter used VanDerLee Snowflakes

1.
Open a blank canvas 550 x 200
Go to selections, Select all
Copy the picture and paste into selection, using the deform tool tool to stretch to fit the canvas if needed,

If you are not going to animate move to step 4

2.
Duplicate this layer 3 for a total of 4 layers, Rename the bottom layer bg and hide, rename to remaining layers a, b & c
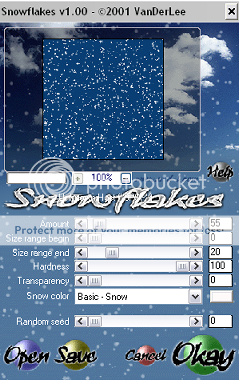
Appy VanDerLee snowflakes to Layers a,b & c with the following setting changing the random seed each time
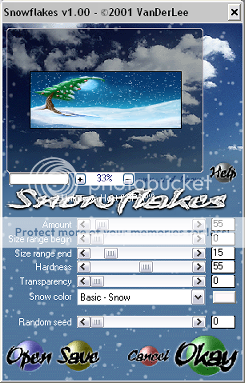
image

3.
Hide layers b & c for now

4.
Copy and paste the bear or tube of choice and move to the right side of the canvas, resize as desired.

5.
Copy and paste the candy cane or other element of choice I resized by 15% smart size, resize all layers unchecked.

6.
Copy and paste the reindeer as a new layer and resize by 25% same settings as before.

7.
Go to selections, select all, modify, contract by 5 pixels, selections, invert, Click on each layer except the bg layer and hit delete on your keyboard, unhide the bg layer, make the top layer active, Add a new raster layer then add a drop shadow H&V 1, opacity 100, Blur 2, Colour black, add the same drop shadow again but change the H&V to  -2.

8.
Add a new layer flood fill with a colour that compliments the tag, go to selections, select all, modify, contract by 1 pixel then hit delete on your keyboard, go back to selections, select none.

9.
add your name & copyright information,

ANIMATION

10.
Hide the bg, a b & c layers, then go to layers, merge, merge visable
Unhide The bg layer and layer a, go to edit, copy merged, then open Animation Shop(AS), go to edit, paste as new animation.

11.
back to Paint Shop(PS) Hide layer a & unhide layer b, go to edit, copy merged, back to AS, Paste after current frame

12.
back to PS Hide layer b & unhide layer c, go to edit, copy merged, back to AS, Paste after current frame, Go to edit, select all, then animation, frame properties set to 20, view your animation. save

  
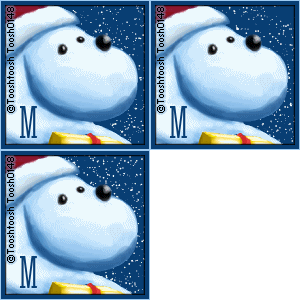
AVATAR

Open a blank canvas 150 x150, flood fill with a colour from your tube, Reapeat step 2 but use the following VanDerLee snowflakes settings
image

Copy and paste your tube, resize as arrange as desired, select the crop tool and snap crop rectangle to merged opaque,

Repeat steps 7, 8 & 9
 
Repeat the animation steps 10, 11 & 12,
 

Your done!


Proud member of Tutorial Writers Inc

Tutorial written by © Mythical
all rights reserved

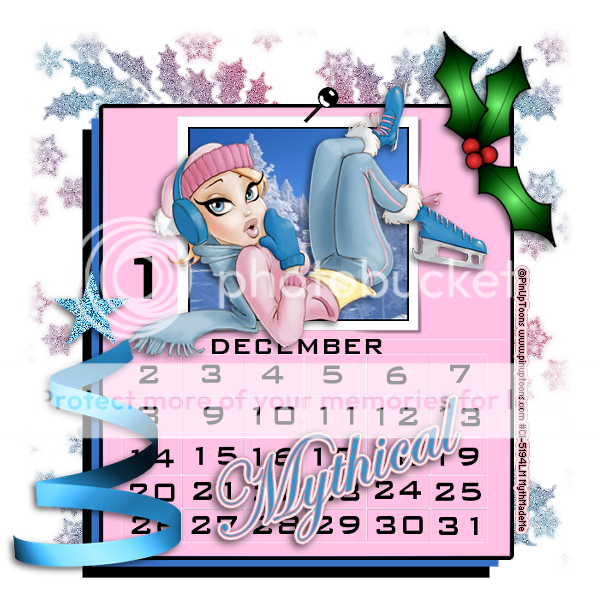
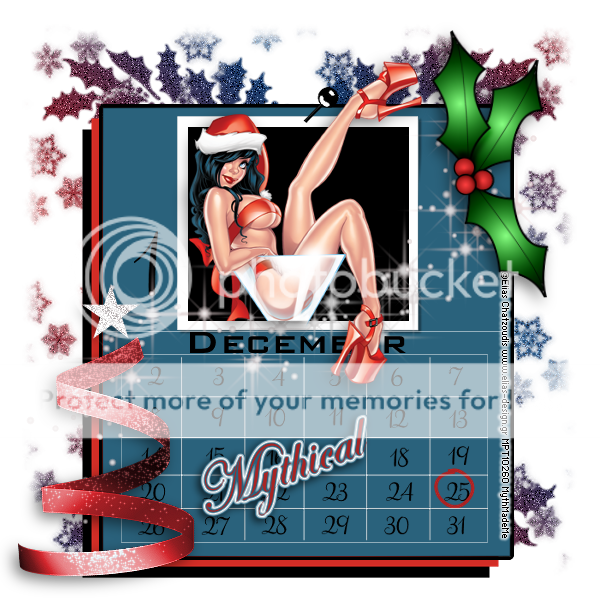
Month of December

                 picture by mythical323

For this tutorial you will need:
Tube of choice I have used the art of Elias Chatzoudis,
you can purchase the tube here at My PSP Tubes
Calendar Template by Ladyhawwk which can be found on Creative Misfits Creations Blog Here
Supplies Here (I have made all the supplies. feel free to use as you wish)

Drop shadow used throughout H 3, V -3, Opacity 66, Blur 12, colour Black

1.

Open the template in Paint Shop

Delete Raster layer 2,

2.

Select the font tool, type 1 and arrange it next to the tube make sure it is pretty big,

Then type 2 etc all the way to 31 in the squares, then right click the layer and convert to raster layer, then type out December and arrange beneath the photo frame

3.

Activate the LHDPhotoFrame layer, Copy and paste your tube of choice, resize and arrange to your liking add a drop shadow.

4.

If there are bits you want to erase, make the LHDPhotoframe active again, click inside the black area with the magic wand, go to selections, invert, now make your tube layer active and erase the parts you want hidden, selections, select none

5.

Click on raster layer 1, add anew raster layer, change the foreground & background colours to 2 quite different colours from your tube, go to gradients and choose foreground/background gradient, angle 45, Repeats 5, flood fill the layer,

6.

Open the mask supplied & minimize, go to layers, new mask layer, from image, find Myth_Msk2 , apply, right click the mask layer, merge, merge group

7.

Activate LHDFrongLargeSquare layer go to Adjust colour balance, manual colour corrections, change the source colour to #808080 and the target to a colour that compliments your tube, repeat this for the LHDLargeMiddleBackSquare layer but change the source colour to #c0c0c0 & LHDLargeBackSquare Layer but change the source colour to #000000

8.

Copy and paste one of the xmas trees as a new layer, move to the bottom left of the calendar, recolor to your liking add a drop shadow.

9.

Copy and paste one of the holly tubes as a new layer, go to image, resize, resize by 50% , smart size, resize all layers unchecked. Then go to image, rotate, free rotate, rotate by 80 degrees right, move to the top right of the calender, all layers unchecked add a drop shadow.


Resize. Add your name & copyright information. You are done!

image

Proud member of Tutorial Writers Inc

Tutorial written by © Mythical

all rights reserved 
Sunday, 7 December 2014

Snow Days


For this tutorial you will need:
A tube of choice, I am using the art of PinUpToons, to use this tube
you will need to purchase it from CDO here
The gorgeous Scrap kit IB PinUpToons  206-2  by Ladyhawwk here
Filters used
Eyecandy 4000, Gradient glow
VanDerLee Snowflakes

Open a transparent canvas 600 x 600, flood fill with white,

Set your background color to a color of choice, one that compliments your tube, select the ellipse tool draw out a circle around the same size as the one shown below.


Do not convert to raster layer yet,select the text tool, select your font I used Navel,size 36, create as vector, hover near the edge of the circle until you see a curve below the A text curser, then click on the canvas, type SNOW DAYS ARE THE BEST DAYS. 

open the layers up by clicking on the + On the New Ellipse layer, right click and convert to raster selection, then open paper 3, copy and paste as a new layer, go to selections, invert then hit delete on your keyboard, now close off the visibility on the new ellipse layer and convert to raster layer.

On the snow days layer, go to effects, plugins, eyecandy 4000, gradient glow, choose fat then set the glow width to 3, apply.

On the paper 3 layer, go to image, resize and resize by 90%, resample using bicubic, resize all layer unchecked then go selections, select all, selections, float, selections, defloat, selections, modify, select selection borders, both sides checked, border width 4, anti alias checked. flood fill with a light color that compliments your tube, selections, select none, go adjust, add/remove noise, add noise, set the noise at 40%, uniform checked and monochrome checked.

Still on the paper layer, then go to layers, duplicate 2 times for a total of 3 layers, then go to layers, properties, change the names of these 3 layers to p1, p2 & p3. 

On the P1 layer, go to selections, select all, selections, float, selections, defloat go to effects, plugins, VanDerLee snowflakes, apply the following settings.


Repeat the last steps on the p2 & p3 layers changing the random seed each time, close out the p2 & p3 layers.

On the p3 layer go to selections, select all, selections, float, selections, defloat then copy and paste your tube as a new layer, arrange to your liking, change the blend mode of this layer to soft light, open Ele 27, copy and paste as a new layer then go to selections, invert then hit delete on your keyboard, on both the tube and the Ele 27 layers back to selections, select none.

Open Ele 4 copy and paste as a new layer onto the canvas, go to image, resize and resize by 65%, no drop shadow, move to the bottom of the cirlce.

Open Ele 13, copy and paste as a new layer onto the canvas, go to image, resize and resize by 70%. arrange to your liking.


Open Ele 17, copy and paste as a new layer onto the canvas, go to image, resize and resize by 70%. arrange at the end of the fence, no drop shadow.

Open Ele 2, copy and paste as a new layer onto the canvas, go to image, resize and resize by 45%. arrange at the end of the fence, you can add a slight drop shadow if desired, I used H2, V -2, opacity 22, blur 4, color black, (when using a drop shadow please make sure none of the element or tube is below the snow it will effect the animation).

Copy and paste your tube as a new layer, resize and arrange to your liking, add a drop shadow.

Open Ele 3, copy and paste as a new layer onto the canvas, go to image, resize and resize by 45%. arrange at the end of the fence, add a slight drop shadow.

Open Ele 11, copy and paste as a new layer onto the canvas, go to image, resize and resize by 30%. arrange so its hanging on the top of the circle, add a slight drop shadow.

Add your name and copyright info. delete the white bg layer, resize if required. your ready to animate.

Animation

Open animation shop, in paint shop, go to edit, copy merged, then in animation shop, edit, paste as new animation

In paint shop, hide p1 layer and open p2 layer, then go to edit, copy merged, in animation shop, go to edit, paste after current frame.

In paint shop, hide p2 layer and open p3 layer, then go to edit, copy merged, in animation shop, go to edit, paste after current frame.

save. your done!

Sunday, 30 November 2014

Classy Christmas


For this tutorial you will need:
A tube of choice, I am usung the art of Verymany
to use this tube you will need to purchase it from Verymany Tubes here
The beautiful scrap kit called Classy Christmas by Ladyhawwk here 
My two masks here 
plugin used VanDerLee UnPlugged-X 


Put the masks into your mask folder.

Open a transparent canvas 600 x 600, flood fill with white.

Add a new raster layer, go to selections, select all, open paper 11 copy and paste into selection, go to selections, select none.

Go to layers, load/save mask, load mask from disk, in the pull down menu select MD_14_09 source luminence checked, fit mask to layer checked, hide all mask checked, apply. go to layers, merge, merge group.

Repeat the last step using paper 7 and mask MD_14_11.

Open frame 1, copy and paste as a new layer onto your canvas,go to image, resize and resize by 65%, resample using bicubic, resize all layers unchecked.

Select the magic wand, tolerance & feather both set at 0, click in the center of the frame, go to selections, select all, selectons, modify, expand by 4 pixels, Open paper 7 again, copy and paste as a new layer go back to selections, invert then hit delete on your keyboard, duplicate this layer.

Copy and paste your tube of choice as a new layer, resize and arrange in the frame to your liking, when happy hit delete on your keyboard then go to selections, select none, drag this layer under the duplicate layer, then change the duplicate layer blend mode to overlay.

Duplicate the tube layer, on the original layer, go to adjust, blur, gaussian set to 2, then on the duplicate tube layer change the blend mode to soft light.

Hide the bottom 2 mask layers and the frame layer, then go to layers, merge, merge visible. unhide the other layers,

on the merged layers go to effects, plugins, VanDerLee UnPlugged-X apply Monotize with default settings.

Copy and paste Ele8 as a new layer,go to image, resize and resize by 60% arrange on the top right corner of the frame.

Copy and paste Ele61 as a new layer, go to image, resize and resize by 55%, arrange on the left of the frame.

Copy and paste your tube of choice as a new layer, resize and arrange on the right hand side of the frame, Duplicate the tube layer, on the original layer, go to adjust, blur, gaussian set to 2, then on the duplicate tube layer change the blend mode to soft light, add the following drop shadow to the original tube layer, H 3, V -3 opacity 56, blur 6, color black (use these settings throughout)

Open Ele 31, copy and paste as a new layer, go to image, resize and resize by 35%, add a drop shadow arrange near the bottom of the tree.

Open Ele 27, copy and paste as a new layer, go to image, resize and resize by 50%, add a drop shadow, arrange near the bottom of the tree.

Open Ele 55, copy and paste as a new layer, go to image, resize and resize by 40%, add a drop shadow, arrange near the bottom of the tree.

Open Ele 24, copy and paste as a new layer, go to image, resize and resize by 30%, add a drop shadow, arrange near the bottom of the tree.

Open Ele 34, copy and paste as a new layer, go to image, resize and resize by 40%, add a drop shadow, arrange near the bottom of the tree.

Open Ele 37 & 40, copy and paste them as a new layer, go to image, resize and resize by 30%, add a drop shadow, arrange them near the bottom of the tree.

Add your name and copyright info, delete the white bg layer, resize if needed. your done!

Saturday, 22 November 2014

Cheers


For this tutorial you need:
A tube of choice I am using the art of Verymany, to use this tube you will 
need to purchase it  from Verymany Tubes here
A wonderful Christmas kit called Here Comes Santa by Miggins Does Scrapville, you can purchase it from any of the stores Miggins sells at here
My mask 14 you can get it here

Open a New transparent canvas 600 x 600,flood fill with white.

add a new raster layer,open paper 19, go to image, resize, resize by 15%,with the following settings, resample using smart size, resize all layers unchecked, copy and paste onto your canvas, go to layers, load/save mask, load mask from disk, select MD_14_11 from the drop down menu, source luminance checked, fit to layer checked, hide all mask checked, apply then go to layers, merge, merge group.

Open element 66, go to image, resize and resize by 18% copy and paste as a new layer, move slightly up and to the right as shown below.


Add a drop shadow H&V 2, opacity 44, blur 4, color black.

Activate the magic wand tolerance & feather set at 0,click in the space in the middle of the frame, go to selections, modify, expand and expand by 7 pixels,add a new raster layer below the frame layer, Open paper22 go to image, resize, resize by 15%, copy and paste into selection on your canvas, do not deselect.

Copy and paste your tube as a new layer position in the frame to your liking then go to selections, invert and hit delete on your keyboard, back to selections, select none, change the blend mode of this layer to Overlay, go to layers duplicate then change the blend mode to Luminance legacy, the duplicate one more time, change the blend mode of this layer to hue legacy.

Activate the rectangle tool, create as vector checked, H&V radius 0 background color any, foreground color nul, draw out a rectangle slightly bigger than the frame, activate the text tool, select the text your using, size 14,Create as vector selected, position the cursor near the edge of the rectangle, when you see the A with a curve under it click and type Naughty or Nice. repeat these word until it fits the entire way round, open the layers and click the eye nest to the layer that says new rectangle, go to layers, convert to raster layer.

Add eye candy 400, gradient glow with the following settings, choose, fat, glow width 3, apply then apply a drop shadow as before.

Open element 64, go to image, resize and resize by 10%, copy and paste as a new layer onto your canvas, go to image, flip, then layers duplicate, free rotate, rotate by 25 degrees right, rotate all layers unchecked, then go to layers, duplicate, repeat the rotate then duplicate and repeat the rotate again, put the elements together like a bunch go to layers, merge, merge down x2.


pen element 63, go to image, resize and resize by 10%, copy and paste on to your canvas as a new layer, add a drop shadow of your choice or Lokas software, 3D shadow with the following settings,go to layers, duplicate and arrange to your liking.


Copy and paste your tube of choice as a new layer, resize and position to your liking, add a drop shadow of choice, I used the Lokas settings as before, close off the white background layer if desired.

Add your name and copyright information. your done!

My Christmas Rose


For this tutorial you will need:
A tube of choice, I am using the art of Stan Dudin to use this tube
you will need to purchase it from PicsForDesign here
The stunning scrap kit I am using is called Christmas Rose
  by MellieBeans, you can purchase it here
My Supplies here 
Plug-in needed - Unplugged

1. Put the mask MD-14_16 into your Mask folder.

2. Open a transparent canvas 600 x 600, flood fill with white.

3. Add a new raster layer, go to selections, select all then open pp06, copy and paste into selection on to your canvas, go to layers, save/load mask, load mask from disk, find MD_14_16 in the pull down menu, source luminance checked, fit to canvas checked, hide all mask checked, go to layers, merge, merge group, move the mask slightly to the right. 

4. Open e57 copy and paste as a new layer onto your canvas, go to image, resize and resize by 78%, with these settings, resample as bicubic, resize all layers unchecked.

5. Open e52 copy and paste as a new layer onto your canvas, arrange in the center of the mask, go to effects, plugins, Unplugged-X apply Tan deform with the default settings.

6. Go to layers, duplicate, change the blend mode of this layer to screen, on the original layer go to adjust, blur, gaussian blur, set at 2, apply, add a drop shadow to this layer of H&V 2, opacity 33, blur 5, color black (this drop shadow is used throughout).

7. Open e42 copy and paste as a new layer onto your canvas, go to image, resize and resize by 65%, arrange on the left hand side.

8. Open e37 as a new layer, go to image, resize and resize by 60%, repeat step 6 on this layer.

9. Open e17 copy and paste as a new layer onto your canvas, go to image, resize and resize by 40%, add a drop shadow, arrange at the foot of the lamp post.

10. Open e15 copy and paste as a new layer onto your canvas, go to image, resize and resize by 25%, add a drop shadow arrange also at the foot of the lamp post.

11. Open e09 copy and paste as a new layer onto your canvas, go to image, resize and resize by 15%, add a drop shadow arrange next to the other rose.

12. Copy and paste your tube as a new layer, resize and arrange to your liking, repeate step 6 on this layer but add the drop shadow twice.

13. Open e21 copy and paste as a new layer onto your canvas, go to image, resize and resize by 15%, add a drop shadow arrange as desired.

14. Open e26 copy and paste as a new layer onto your canvas, go to image, resize and resize by 15%, add a drop shadow arrange next to the other bauble.

10 Open MD_WordArt supplied, copy and paste as a new layer onto your canvas, arrange at the top (see my tag for reference).

Add your name & copyright info. Resize & delete the bottom white layer if desired. Your done!

Wednesday, 19 November 2014

Ice Queen


For this tutorial you will need:
A tube of choice, I am using the art of Chris Pastel, to use this tube
you will need to purchase it from PicsForDesign here
The beautiful kit I am using is called Tranquil Winter by Ladyhawwk, 
you can purchase it here
Font used Buffet Script here

Open a trasparent canvas 600 x 600, flood fill with white.

Open TW-Ele56 copy and paste as anew layer onto your canvas,Go to image, resize use these settings, resample by bicubic, resize all layers unchecked (use these settings throughout) resize by 80%.

Open TW-Ele69 copy and paste as a new layer onto your canvas.

Open TW-Ele60 copy and paste as a new layer onto your canvas, go to image, resize and resize by 80% go to effects, 3d effects, drop shadow, add the following drop shadow to this layer, use the same settings each time, H -2, V 2, Opacity 44, blur 6, color black.

With the window layer still active select the magic wand, click on an area of your outside of the window, go to selections, modify, expand y 2 pixels, open TW-Paper11 copy and paste it as a new layer onto your canvas then hit delete on your keyboard, go to selections, select none.

Open TW-Ele21 copy and paste it as a new layer onto your canvas, go to image, resize and resize by 50%, drag this layer below the window layer and arrange to your liking.

Open TW-Ele9 copy and paste as anew layer onto your canvas, go to image, resize and resize by 50%, arrange on the left of the window.

Open TW-Ele54, copy and paste as anew layer onto your canvas, go to image, resize and resize by 50%, arrange at the bottom of the window frame.

Copy and paste your tube of choice as a new layer, resize, position to the right hand side of the window, when happy add a drop shadow.

Open TW-Ele28 (you may want to use other elements there are so many beautiful elements to use in this kit) copy and paste as a new layer onto your canvas, go to image, resize and resize by 65% arrange on the upper right hand side of the window frame, add a drop shadow.

Open TW-Ele32, copy and paste as a new layer onto your canvas, go to image, resize and resize by 50% arrange on the lower right hand side of the window frame, add a drop shadow.

Add your name and copyright info.Resize and delete the white background layer if disred. Your done!


Tuesday, 18 November 2014

Christmas Shimmer


For this tutorial you will need:
A tube of choice, I am using the art of Vermany to use this tube
you will need to purchase it from Verymany Tubes here
The stunning scrapkit I am using was made by MellieBeans, you can purchase it here
My mask here 

Put the mask MD-14_12 into your mask folder.

Open  a transparent canvas 600 x 600, flood fill with white, go to layers, new raster layer, go to selections, select all, open pp08, copy and paste into selection, go to layers, load/save mask, load mask from disk, in the pull down menu find MD-14_12, source luminance checked, fit to canvas checked, hide all mask checked, apply, go to layers, merge, merge group.

Open e23, copy and paste as a new layer, go to image, resize and resize by 47%, resample by bicubic, resize all layers unchecked.

Activate the magic wand, tolerance & feather set at 0, click in a space outside the frame as shown below


go to selections, modify, contract by 4 pixels, open pp02, go to image, resize and resize by 60%, copy and paste as a new layer then hit delete on your keyboard, selections, select none, drag this layer beneath the frame layer.

Open e03 copy and paste as a new layer, go to image, resize and resize by 70%, arrange on the left hand side of the frame, add a drop shadow with the following settings H -3, V 3, opacity 66, blur 13, color black (this drop shadow is used throughout the tutorial).

Open e12, copy and paste as a new layer, go to image, mirror then back to image, resize and resize by 80%, arrange on the right hand side of the frame (see my tag for reference)add a drop shadow.

Open e15, copy and paste as a new layer, go to image, resize and resize by 27%, arrange on the right hand side (see my tag for reference) add a drop shadow.

Open e20, copy and paste as a new layer, go to image, resize and resize by 38%, arrange at the base of the tree.

Open e06, copy and paste as new layer, go to image,mirror, then image again, resize and resize by 35%, arrange on the bottom left of the tree, add a drop shadow.

Open e31, copy and paste as a new layer, go to image, resize and resize by 33%, arrange on the bottom left of the tree, add a drop shadow.

Copy and paste your tube of choice as a new layer, resize and position to your liking, go to layers, duplicate, on the original layer, go to adjust, blur grassian blur, set at 2, add a drop shadow then on the duplicate layer change the blend mode to screen.

Add your name and copyright info. Your done!